Requisitions
The Requisition lookup lists all the requisitions that you have created via the Desktop App. Process each generated requisition via the MailCenter App.
Create a requisition
Select the shipment type on the Welcome page (one that includes "REQUISITION" on the button), proceed through the workflow providing all required details, and once you reach the Confirmation page, click CREATE REQUISITION. The requisition is stored in the Requisition lookup with the status of Generated, ready to be processed in the MailCenter App.
Reprint a requisition
To reprint documents generated with a requisition, on the Welcome page, select any shipment type. This opens the Address Details page where you can access the Requisition lookup, and select the required requisition. Selecting a requisiton adds a REPRINT REQUISITION button to the Address Details page.
Edit a requisition
Editing an existing requisition creates a new one.
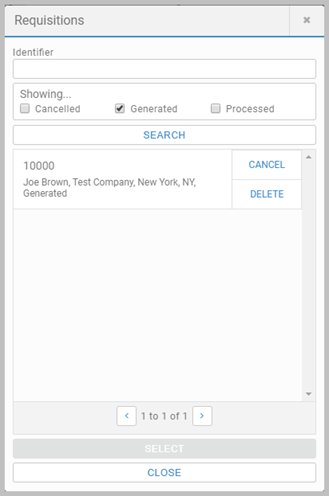
Search for a requisition
The Requisition lookup lets you search for requisitions. Type in the requisition identifier, or filter your search by numerous categories that reflect your requisition's tracking history.
Cancel a requisition
Each requisition includes the CANCEL button. Cancelling a requisition cancels out its status, but does not remove it from the lookup. A popup message will present confirming the action. If trying to cancel a requisition that has already been cancelled, a prompt will appear to inform the user.
Delete a requisition
Each requisition includes the DELETE button. Deleting a requisition removes it from the lookup. The App will ask for confirmation.
Customized requisition statuses
By default, the Requisitions lookup features the statuses: Generated, Processed and Cancelled. Additional statuses can be configured through Designer.
- Welcome details shipment types you can choose from to create a requisition.
- Confirmation details how to finalize creating a ship requisition.
- Localization details how a requistition with localized settings influences the MailCenter App.
- Requisitions outlines how to configure the additional states in Designer.