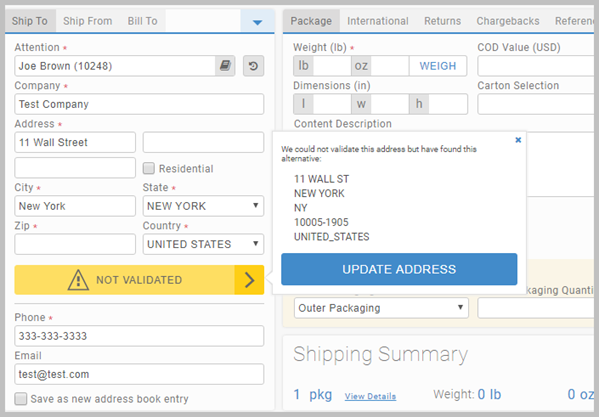
Address validation across the Apps
Use any shipping App or office App to validate the address. This is typically done from the Ship To tab where the VALIDATE button is located.
How it works
Addresses are validated by a carrier. If no default carrier has been specified or the default carrier doesn't support address validation, then you will be unable to validate an address in any App. See Admin setup for default address validator configuration steps.
If the address has been corrected by the App (e.g. the Residential checkbox has been disabled/enabled, the Zip field's been amended, etc.), you will still need to replicate the changes in the Address Book.
Validation steps
- Open a shipping App.
- From the Carrier dropdown, select the carrier that supports address validation.
- In the Ship To tab input the address detail, manually or through the Address Book.
- Click the VALIDATE button:
- If the address is valid, the button will turn green and read VALID.
- If the address is invalid and no alternatives are available, the button will turn red and read INVALID.
- If the address is invalid but there are alternatives available, the button will turn yellow and read NOT VALIDATED. Select an alternative from the popup or return to the App's main screen.

If you amend any field, the button will return to its original state prompting you to re-validate the address.
If there is no default carrier configured, or the default carrier doesn't support address validation, the button will turn red and read INVALID.
Article last edited 9 January 2019