Carriers
Logistics Server can include any number of carriers. On the Carriers page you have the tabs: Carrier, Accounts, Rate Groups, Third Parties, International Defaults, Consolidation Defaults, Carrier Permissions , Routing Conditions, Routing Rules , Code Translations. Each tab lists its items in a table, and with the exclusion of the Carrier tab, includes an + ADD button to add new ones. Individual items (rows) can be edited, and again with the exclusion of carriers, deleted.
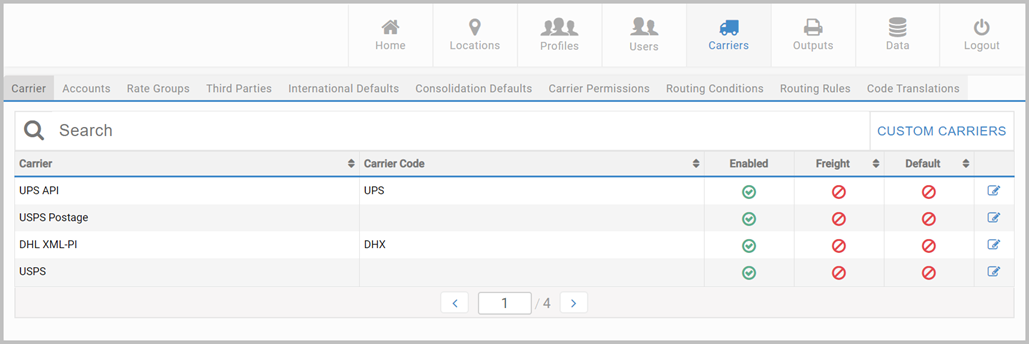
Carrier
TopYou can use this tab to onboard carriers by manually filling in the required detail. However, if supported for your carrier, you can also be guided by Setup My System on the Home page. See Use Setup My System.
When editing, carrier detail is organized across the tabs: Carrier Details, Service Details, Package Types, Carrier Rates, Security Credentials, and Special Services. Below the image, we only document key points.
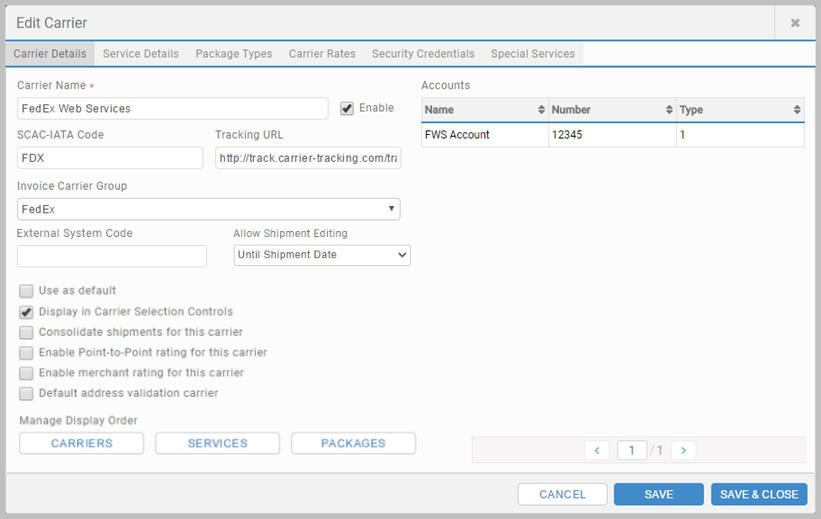
Carrier page - Carriers tab - Edit Carrier popup - Key points
- On the Carrier Details tab, use the Enable and Display in Carrier Selection checkboxes to control the availability of a carrier. You cannot delete or remove carrier components.
- On the Carrier Details tab, use the CARRIERS, SERVICES and PACKAGES buttons to control the display order of enabled carriers, or enabled services and packages for this carrier.
- On the Carrier Rates tab you can control how rates are applied, including, if you have one, setting a Custom Rate Engine for the carrier. See Rates for details.
- If operating with CargoWise One integrations, you will need to configure external system codes at both the carrier and carrier service level. This is done by setting the External System Code field to the relevant CargoWise One Organization Code when editing carriers and carrier services. This ensures Transtream uses the correct carrier when receiving and processing CargoWise One shipment requests.
Accounts
TopTypically, accounts are created as part of carrier onboarding, and include details such as account numbers and shipping keys. Much of the detail is supplied by the carrier. Click + ADD ACCOUNT to add a new account, or select a row and click Edit. Below the image, we only document key points.
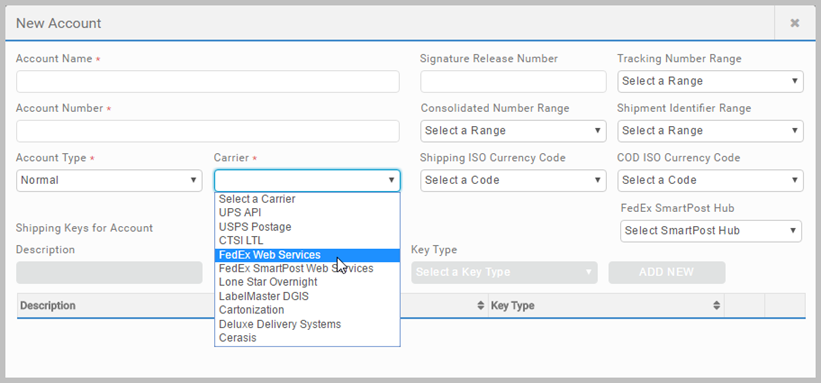
Carrier page - Accounts tab - New/Edit popup - Key points
- The Carrier dropdown selection determines what is shown on the popup and which fields are mandatory.
- If the account is for consolidated shipping, ensure the Account Type is set to Consolidated Shipping.
Rate Groups
TopRate groups are pools of carrier services that rates are selected from. Click + ADD RATE GROUP to add a new rate group, or select a row and click Edit. Below the image, we only document key points. See Rates for more detailed content on rate groups, carrier rates, and Custom Rate Engines in Transtream.
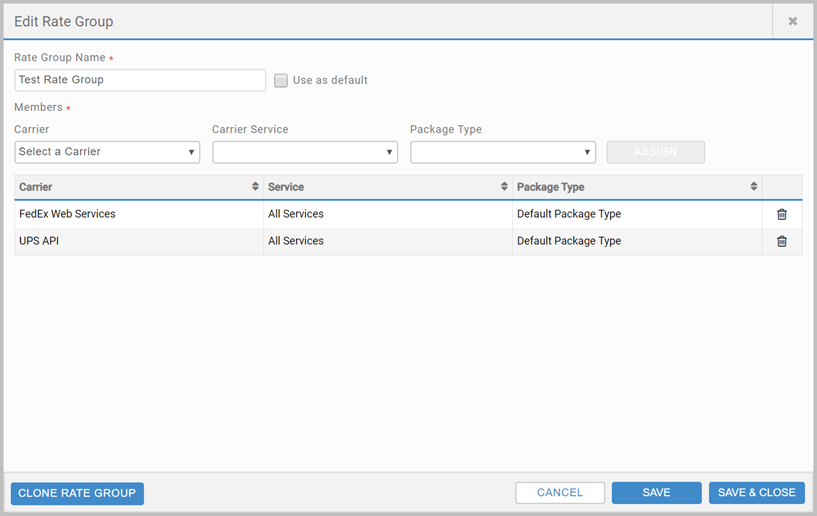
Carrier page - Rate Groups tab - New/Edit popup - Key points
- When adding a new rate group, you need to name it and SAVE before you can assign members.
- For new installs, the first rate group created will be assigned as default.
- Once set, you cannot de-select or delete the current default rate group without first assigning another as default.
- Use the CLONE icon to clone a rate group and its members. The button is only enabled if the rate group has at least one member.
- The default rate group is used during rate shop. To use another, configure the Alternate Rate Group App setting. See App Settings for detail.
Third Parties
TopThird parties are Broker, Importer of Record or Return To contacts. Click + ADD THIRD PARTY to add a new one, or select a row and click Edit. Below the image, we only document key points.
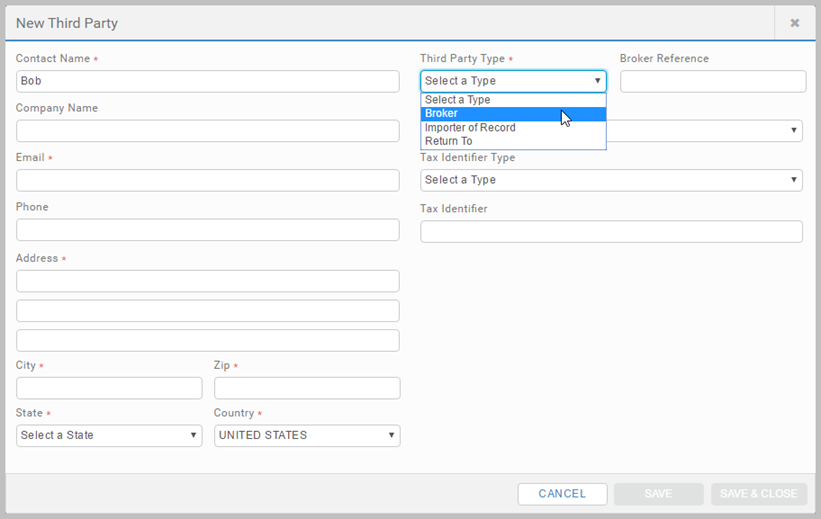
Carrier page - Third Parties tab - New/Edit popup - Key points
- Third Party Type is the key field to set.
International Defaults
TopYou can have sets of defaults for export shipments. Click + ADD DEFAULT to add a new set of defaults, or select a row, and click Edit. Below the image, we only document key points.
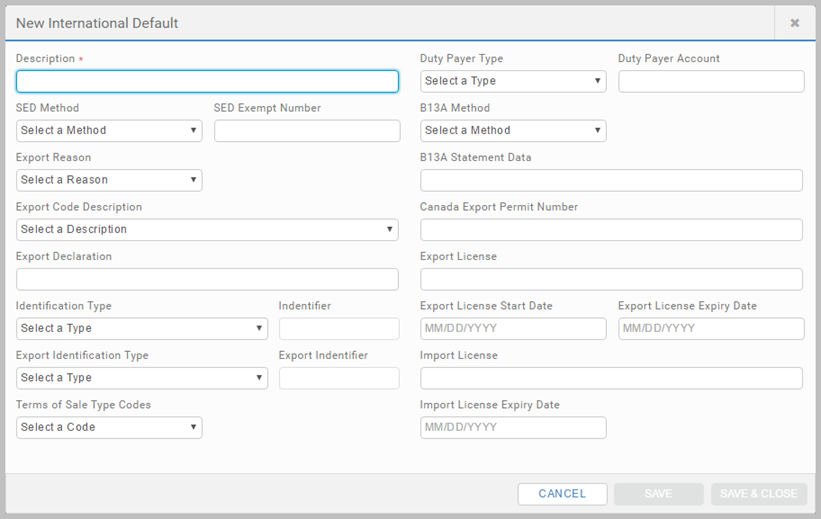
Carrier page - International Defaults tab - New/Edit popup - Key points
- Only Description is mandatory.
Consolidation Defaults
TopYou can have sets of defaults for consolidated shipments. Click + ADD DEFAULT to add a new set of defaults, or select a row and click Edit. Below the image, we only document key points.
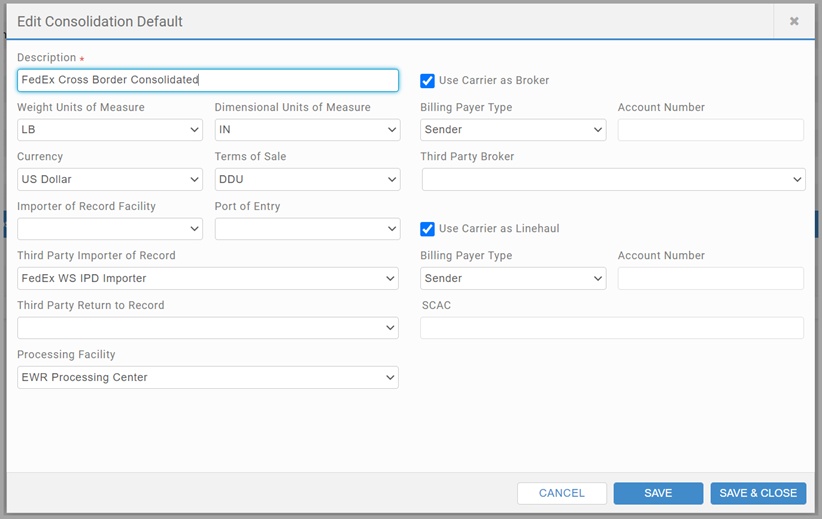
Carrier page - Consolidation Defaults - New/Edit popup - Key points
- Only Description is mandatory.
- When shipping with FedEx Cross Border, you must define a Consolidated Processing Facility from the Processing Facility dropdown.
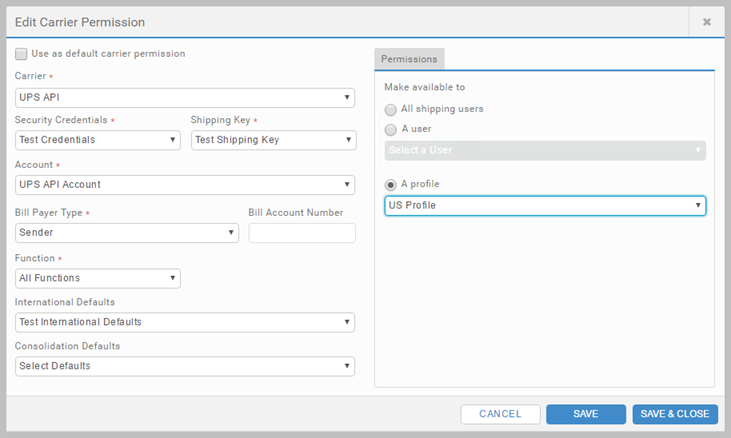
Carrier Permissions
TopCarrier permissions define how a carrier can be used and the credentials for using it. Carrier permissions are a central resource configurable here and, because they can be assigned to users and profiles, under those Administration App pages too. Click + ADD CARRIER PERMISSION to add a new one, or select a row and click Edit. See Carrier Permissions for general information about the role of carrier permissions and their configuration.
Routing Conditions and Rules
TopUse the Routing Conditions and Routing Rules tabs to configure criteria-based routing rules. The rules specify optimal combinations of carrier, carrier service, rate shops and billing detail that will be applied to shipments that match certain conditions. You can use routing rules to optimize the shipping process of regular transactions.
Shipments must match all criteria outlined by a condition before a routing rule is activated; once all conditions are satisfied, your chosen details specified as the rule are applied as a route. Criteria can include elements such as destination, weight and shipments processed in certain time windows.
Routing Conditions
To operate with routing rules, you must first create the routing conditions. On the Routing Conditions, select + ADD CONDITION. In the popup, enter all details that must be met when shipping before the rule is triggered and route applied. The route is applied when data entered into the App, and passed in a request, matches the detail specified in a routing condition.

Carrier page - Routing Conditions tab - New/Edit popup - Key points
- Use the Enabled checkbox to enable the condition.
- Set the Origin Location the transaction must be shipped from. The condition will only be met if the location specified in the condition matches the logged in user's shipping location.
- Use the Destination field to apply conditions based on the Ship To State field.
- Use the Customer Identifier field to apply conditions based on the Ship To Attention field.
- The Parameter fields are used to define additional shipments parameters as required. For example, relevant reference detail from Reference One field.
- In the Scheduling Details section when selecting days, the product automatically populates the From and To fields with the values 00.00 and 23.59, indicating the entire day.
- Day and time-specific conditions are applied using the Ship Date and Ship After Time fields from the dropdown of the carrier selection section. See Carrier Selection for detail.
Routing Rules
Once routing conditions have been created, use the Routing Rules tab to define the rules that will be executed once all related conditions are met. Select + ADD RULE, and enter the relevant information.
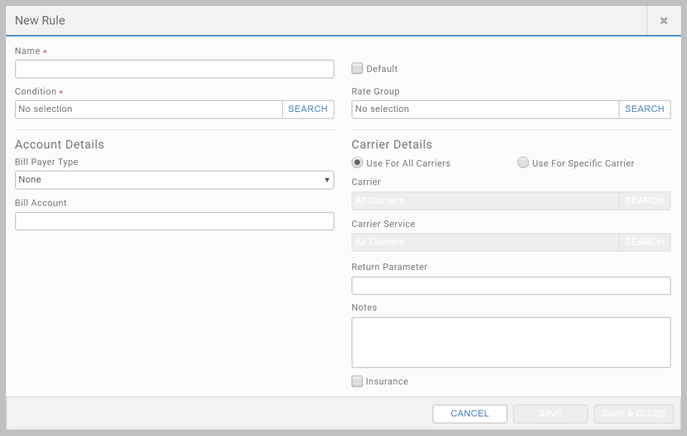
Carrier page - Routing Rules tab - New/Edit popup - Key points
- Use the Default checkbox to make a rule the default. This does not impact the application of the rule, but if checked, the rule is used when no conditions are met.
- Use the Condition field to select the relevant condition.
- Specify a rate group using the Rate Group field, and choose from available groups. See Rate Groups for detail.
- In the Acccount Details section, specify the Bill Payer Type and Bill Account.
- The Carrier and Carrier Service fields are disabled if the Use For All Carriers option is selected. Choose Use For Specific Carrier to activate them.
- Return Parameter is used to return additional information in the Route response when the route is applied.
- Use the Notes field to provide notes to accompany the shipment.
- The Insurance indicates whether shipments that meet the rule conditions should be insured.
Operating with multiple rules
Applied rules are specified as unique routes in the Route response, meaning you can operate with multiple rules in effect. For example, combining carrier-specific routes with those that apply other attributes, such as insurance.
Code Translations
Use the Code Translations tab to define and manage any custom codes. Custom codes are internal codes that are used to determine how a transaction is to be shipped. When loaded into a Shipping App, the fields defined during configuration populate the associated fields in the App. See Carrier Selection - Custom Codes for detail.
Click + ADD CODE TRANSLATION to add a new one, or select a row and click Edit. The following elements can be defined when configuring custom codes:
- Carrier.
- Service.
- Special Service. Limited to Saturday Delivery, COD - Any and COD - Guaranteed Funds.
- Package Type.
- Payer Type.
- Residential.
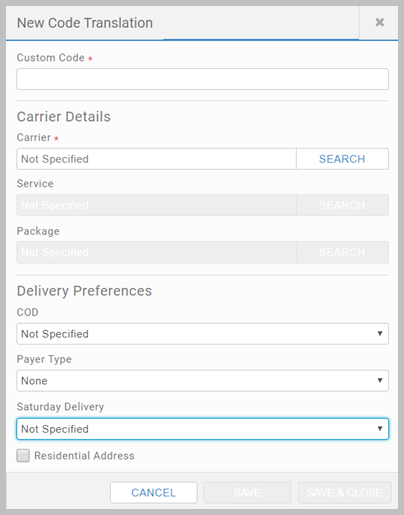
Carrier page - Code Translations tab - New/Edit popup - Key points
- Only Custom Code and Carrier are mandatory.
- The Service and Package fields enable when the Carrier field is populated.
- Use Setup My System details how to use it to onboard carriers.
- Carrier Components lists supported carriers and links to their set up topic.
- The Administration App gives an overview of the App and all its pages.