Add a data source connection
Data source connections allow Apps to access external data. There are several types of connection, and you can have any number of connections. See Data Sources for a detailed introduction. This topic walks you through the process of adding a connection - in this case, a connection to a Microsoft SQL Server database. Adding any connection follows the same basic steps.
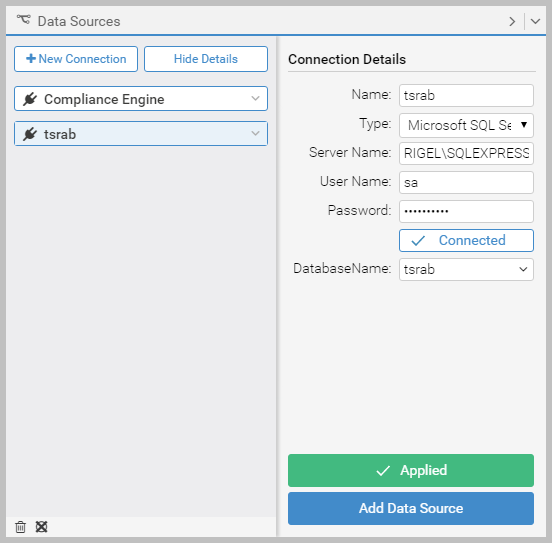
To add a data source connection to a SQL Server database instance:
- Open an App in Designer, and in the Data Sources panel,
click
 .
. - Give the connection a Name, and then in the Type dropdown under the
Data Engine list, click Microsoft SQL Server.
Data Engine means it is on the same server as the Transtream instance. Once Type is set, the fields under Connection Details adjust accordingly.
- Supply the Server Name, User Name and Password, and
then click
 to establish the connection.
The button transitions through
 to
to
 . If the connection can't be established, Designer
displays a warning, and you should check the details you have provided.
. If the connection can't be established, Designer
displays a warning, and you should check the details you have provided. - In Database Name, select the name of the database in the SQL Server instance, and then click Apply to save the connection.
You can now add any number of data sources within the connection. In this case, tables in the SQL Server database. Data Sources outlines this process.
Structural changes to data sources used by existing connections
Once a data source connection exists, if the structure of the data source itself then changes, for example a new column is added to a database table, you may have to add the connection again. In such cases, at runtime, Transtream will return and log an error stating that there is no key set for the update in the data source. Changes to data sources should be investigated for their potential impact on existing Apps. For example, if you have Data Engine Modify actions (on Buttons) that target a data source that has changed.